
Last month I was thrilled and stunned to find out I had made it to Round 2 of the May Arts design team call! I love their products, and they have so many styles, textures, and colors of ribbon that they are truly the go-to place for trims. You need look nowhere else! Making it to Round 2 means that I had to come up with a project that featured May Arts in a fun and exciting way. After putting my thinking cap on, I decided upon a purse for my daughter. She is a creative girl, and she loves that momma is a crafty chick. I told her I would make her a purse out of daddy's old jean pockets and she was very thrilled. She said "Mommy that will be perfect because it will be something from daddy and something from you and I can keep it forever!" That melted my heart, and I am so happy she appreciates the thought and effort behind upcycled and homemade gifts!
This purse is completely no-sew. I don't own a sewing machine, and even though I can sew by hand if need be, I wanted to share a fun tying technique that anyone can do. For this project, you will need:

- Tons of May Arts ribbons!
- Two denim pockets, cut from old jeans.
- A crop-o-dile or other punch that will go through denim.
- Lots and lots of brads, I ended up using 52.
- Fabri Tac from Beacon Adhesives.
- Pony beads
Step 1: Using a sharpie and a ruler, mark evenly spaced holes just inside the denim pocket seam. These are the holes that will be tied to make the purse secure. Use a crop-o-dile to punch through the holes.


Step 3: Gather brads and fairly thin strings for tying the purse together. I used SM03 Navy String and strands of burlap taken from a section of 398-4-11 Natural Wired Burlap.


Step 4: Begin the tying process. Place the pockets back to back. Thread a piece of string through the holes of both pockets, and tie them together snugly.


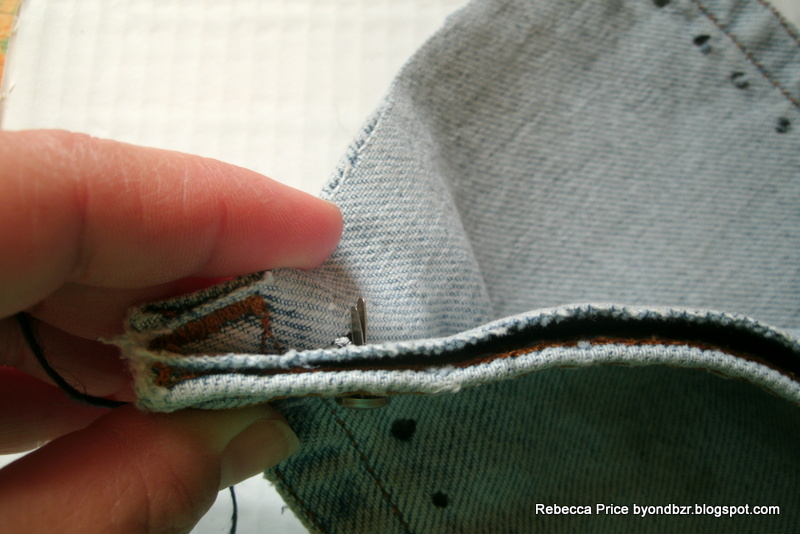
Step 5: Position the brads. Each hole needs a brad, so there will be two that need placed after tying each string. Place a brad through the hole, spread the pockets apart, and flatten the wings down. Each brad needs to go through only one pocket.


Step 6: Continue down the side of the pocket, tying a hole and then placing the brads in each as you go.


Step 7: At the bottom of the purse, add a fringe by looping extra string underneath the brad wings. A tiny bit of Fabri Tac placed after putting in the brads will help hold them in place. I used 363 Twisted Burlap in Red and White for this.


Step 8: Continue tying strings, placing brads, adding fringe, etc across the bottom and up the opposite side.


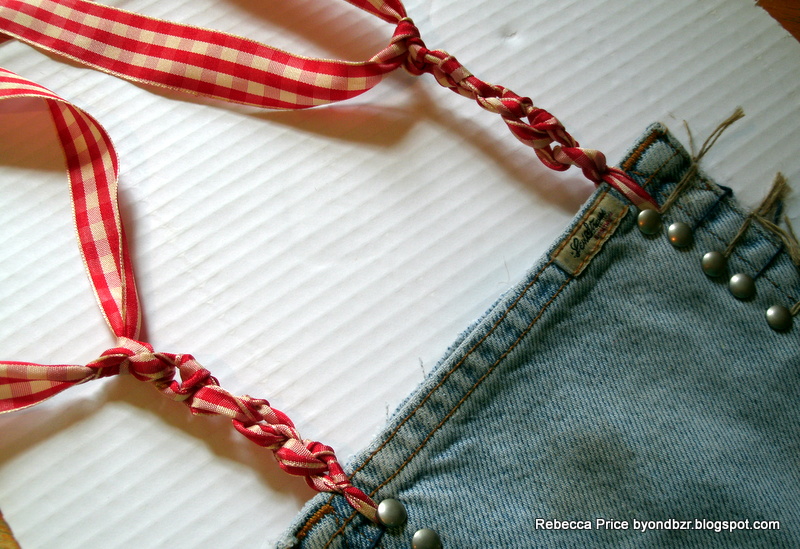
Step 9: When you reach the last hole, you need to put in the ribbon that will be the purse strap. Remove the brads from the top hole on the other side and add the strap to that side as well. Thread this ribbon up and through, then do the side-tying and brad techniques again. After that, start tying knots in the purse strap ribbon. Tie each side up until you reach the desired length, then tie both sides together to make the finished strap. Your basic purse should be completed at this point!


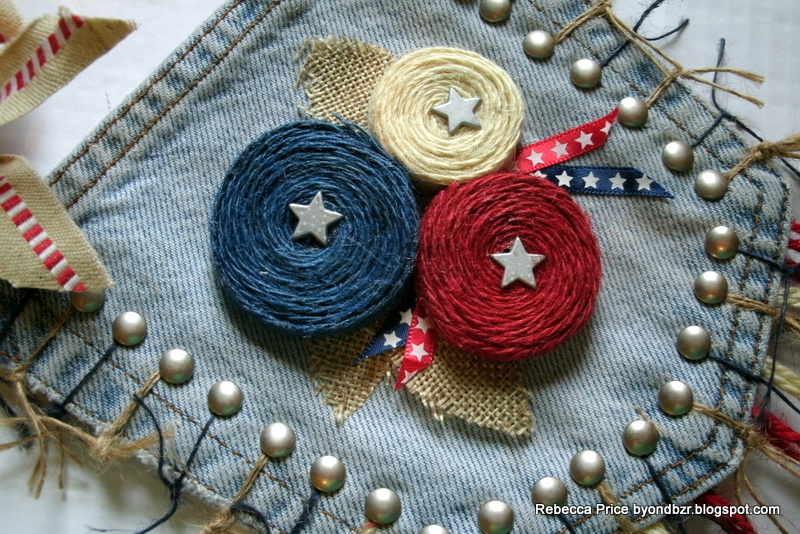
Step 10: With the purse form completed, now you can get to the fun stuff: Decorating! I made some simple rolled flowers with 408 Woven Burlap in Red, White, and Blue. Star brads from my stash were perfect flower centers. I made leaves with 445 Faux Burlap. A few strips of SA03 and SA14 Satin/White Star ribbon in Red and Blue completed the look. These were all attached with Fabri Tac.
Step 11: Add some whimsy to the purse with some pony beads tied into the bottom fringe.


Now the purse is done! This is a great project to sit down and do on a rainy day, or when you just want to throw a movie in, but keep your hands busy while watching it.


The best part for me, was the look on my daughter's face when I gave her this. She was completely overjoyed. She has taken it with her everywhere since! It's perfect for her money, lip gloss, and small toys.

What do you think? Is this something you think you might try? Let me know!

15 comments:
This turned out amazing. What a clever idea!
I love this so much! You did an amazing job with all that ribbon!
Super cute!! Love it. Got jeans...will follow. Arrrrggghh...my Crop a Dile is stuck, still trying to get a snap off of it!
That is such a perfect July gift. I love the whole purse but my fave parts are the little details. The knotting on the ribbon strap, the flowers, and the fringe with beads. Perfect for a little girls purse. Now can you make one in diaper bag size?......LOL
Rebecca, this is a great project. Love the fringe & flowers. Fabulous tutorial with great step-by-step instruction...I can do this!
very cool
Fabulous! Love it!
Www.theeverydayscrapbooker.weebly.com
Congratulations on making it to round 2!! I just love your project. Definitely something my 12 year old would love and we could do together. Thank you!
Freaking awesome! Love it!!!
Such a super cute idea Rebecca!!! Great job!
So cute, love it :)
Seriously love the Americana vibe to this. I would have never thought of the brads and fiber- you are just too darn creative! Those rolled flowers ROCK!
You are crazy talented!! Love this!
Wow! This is so cool! I love your creative stitching idea with the burlap strands and brads! My girls would totally flip if I created purses like this for them! Everything about this project just screams fun! I'm definitely going to give this a try. Thanks so much for sharing your process. May Arts would be so lucky to have you as part of their team! Good luck! =)
This is a great idea and your tutorial is easy to follow. The purse turned out great and I'm glad your daughter loves it. Good luck to you on making the team. I know I hope you do.
Post a Comment